Mollie Bakes: Sweet Treats versus Savory Eats

One of my favorite food-related questions to ask of others is fairly straightforward: do you prefer your baked goods sweet or savory? Do you have a sweet tooth like no other or a preference for the savory, opting for salt over sugar? It seems pretty simple to me, but it can trigger a variety of answers.
Of course, #teamboth is never off the table, but what is your gut reaction? Which do you immediately pick when posed the question: would you like a sweet treat or a savory eat?
To assist in your decision-making, I’m offering up two incredible recipes that I have baked recently: one sweet, one savory. And since I could never pick favorites, I’m telling you that it’s impossible to pick the wrong one. Unless you have a preference for sweet over savory, or vice versa.
Mother’s Day is a few days away and since we cannot be together right now, why not write your mom (or mother figure or whomever means so much to you) an IOU for one of these delicious baked goodies. I’m sure she would be ecstatic to receive either one, freshly baked by you.
Just make sure you ask the pivotal question first: sweet…or savory?
Team Sweet

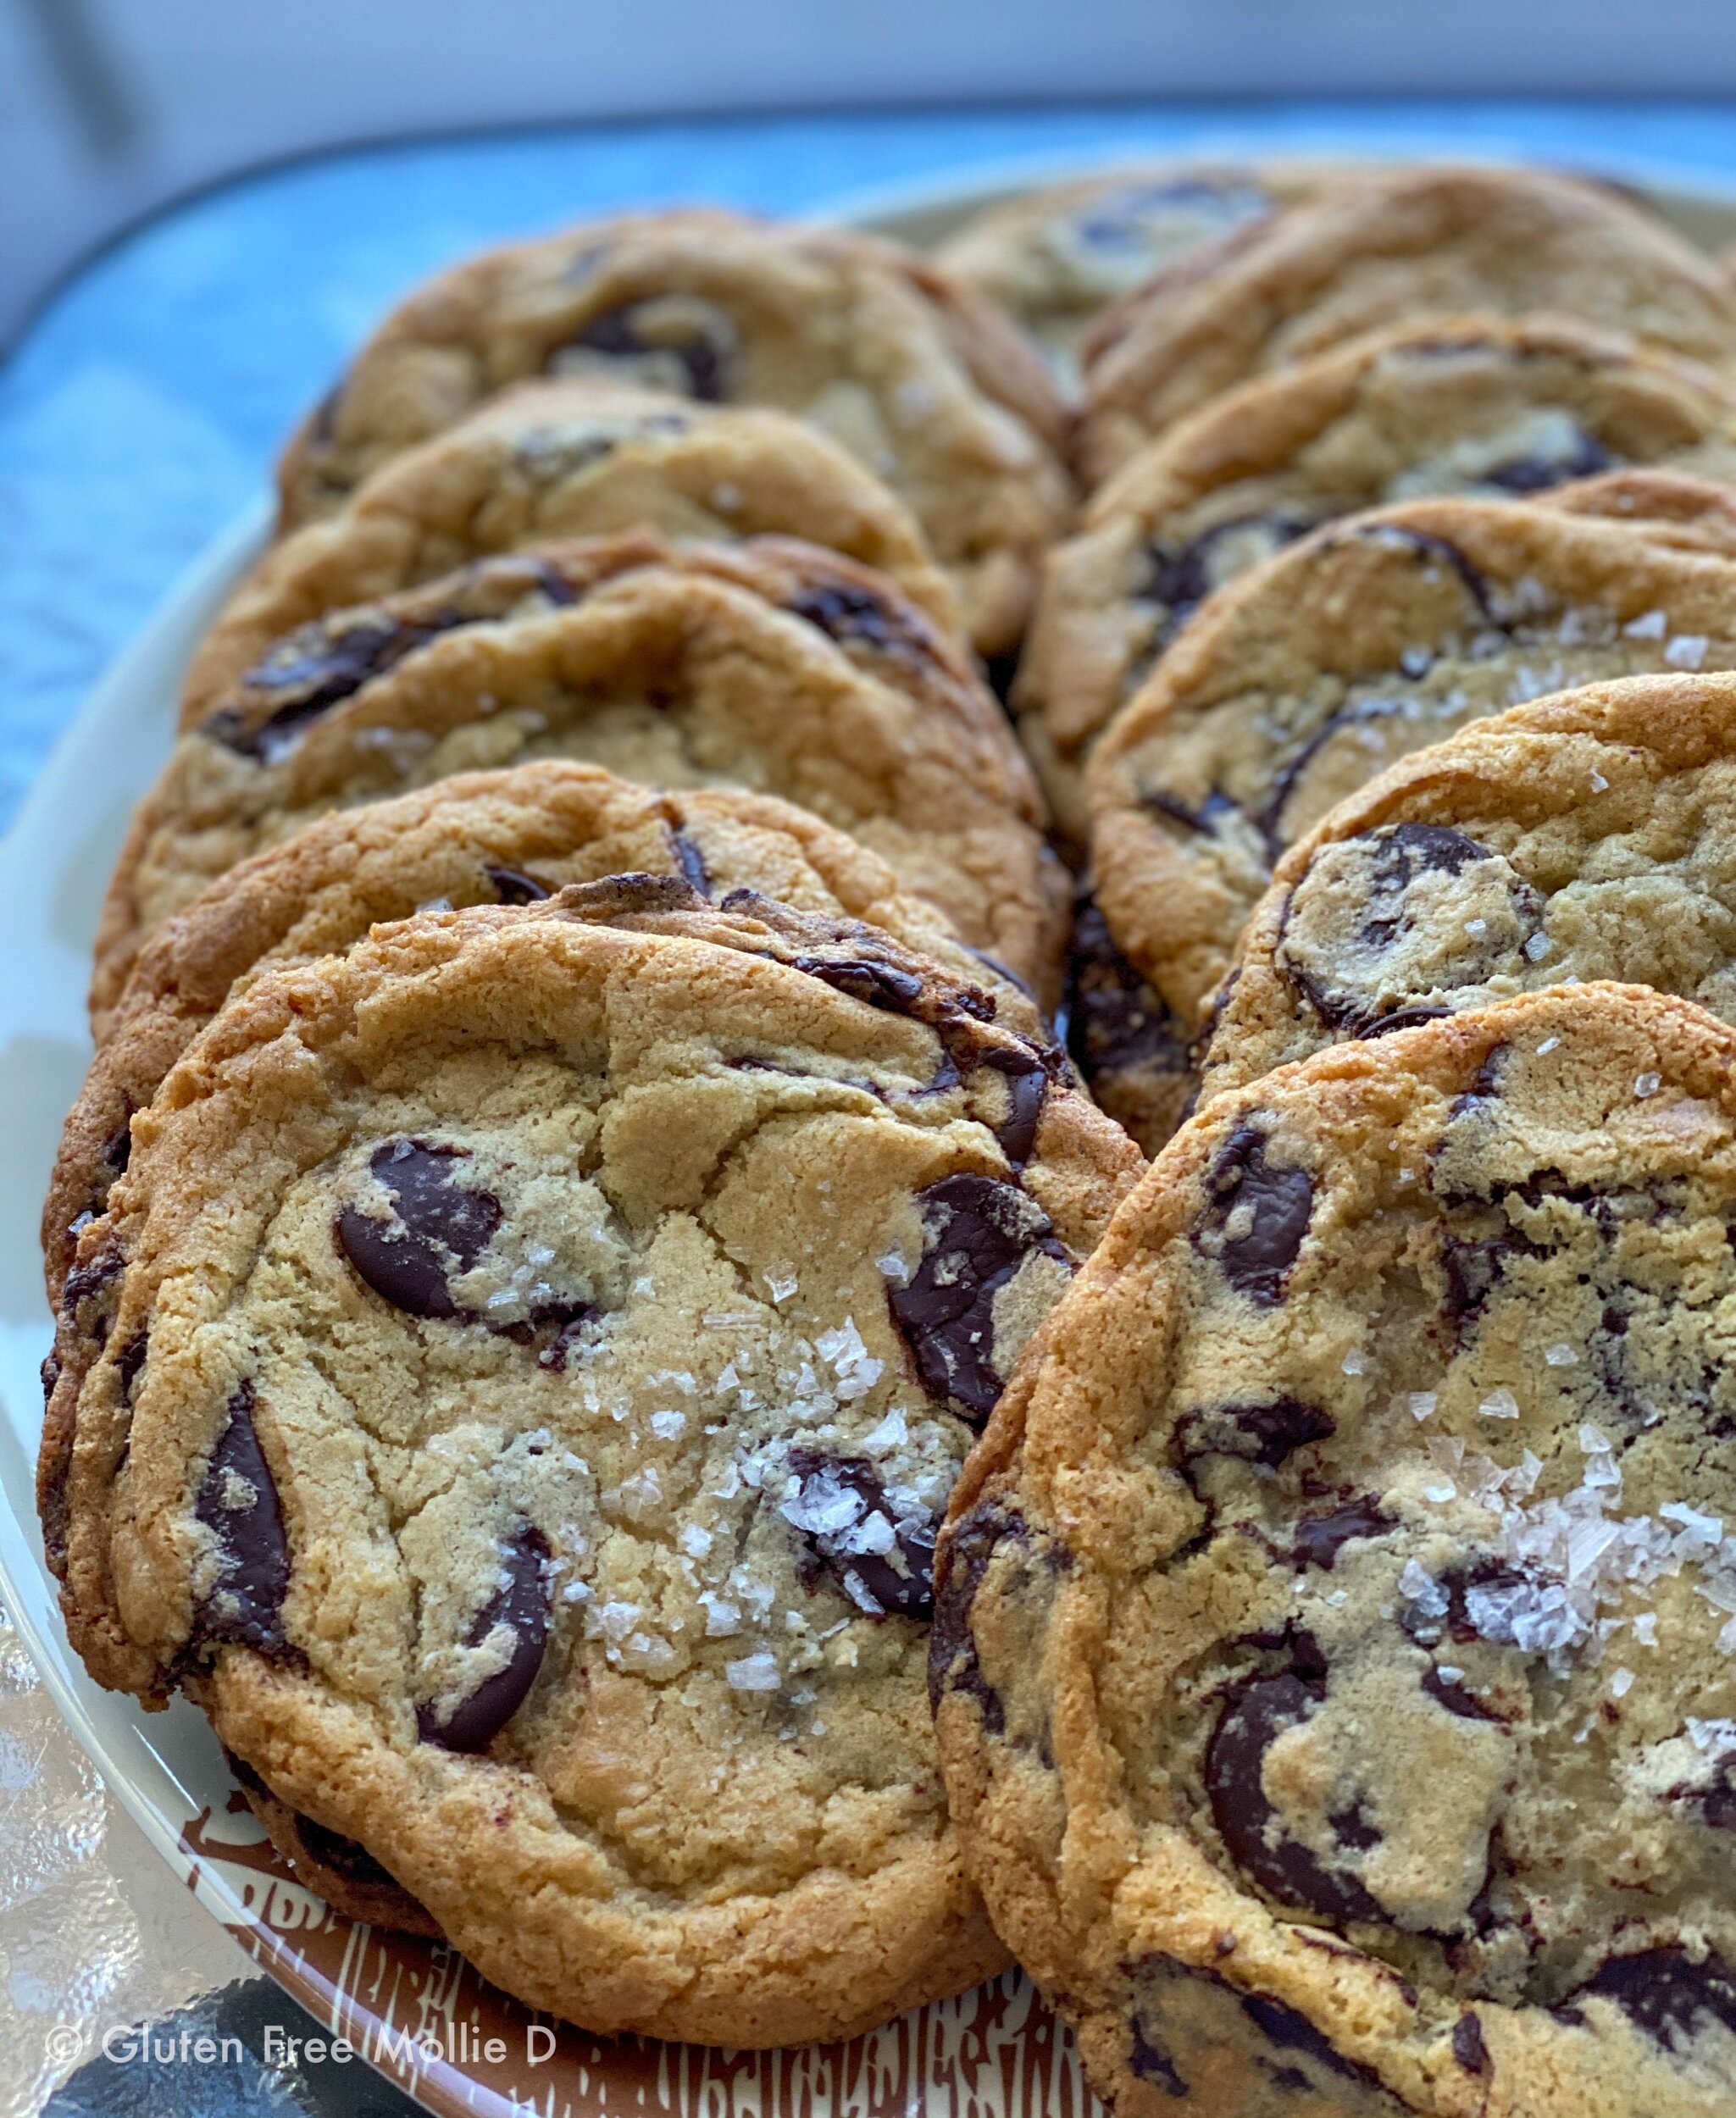
Bake this: Jacques Torres Chocolate Chip Cookies (NYT Cooking recipe by David Leite) A simple Google search will yield results for this recipe as well. I have linked the exact one I chose to use.
Gluten Free: For this recipe I used Cup4Cup gluten free flour instead of the cake and bread flour listed. I never shy away from this simple substitution to make my baked good of choice.
As always, I strongly recommend using the highest-quality butter and chocolate you can get your hands on for all cookie-baking. For these cookies, I used Kate’s of Maine unsalted butter. My other favorite brands of butter include Plugra, Vermont Creamery, Cabot, and Kerrygold. They’re all so good for baking and just about everything else. Basic toast included!
In regard to chocolate, well, I just always use Guittard. Guittard Bittersweet Chocolate baking wafers are my go-to for cookies. The quality is incredible and is worth the higher price point. I may need to start buying it in bulk.

Tips: Follow the instructions! When it says to refrigerate the dough for 24 hours at minimum, or up to 72, do it! I know it’s tough and you’ll want to bake them much sooner, but trust me. These cookies are worth the wait. I waited about 40 hours (!) before baking them and I don’t regret a single minute.
Also, these are very large cookies! You could make the mounds of dough smaller than the recommended 3 1/2-ounce size, but where is the fun in that? I personally prefer to follow a baking recipe exactly as written the first time around, and then make my tweaks (if needed) on round two.
In terms of baking, I have noticed that gluten free cookies tend to spread out more in the oven than non-GF ones so be prepared. Do not bake six cookies at once. I’d recommend no more than three at a time to make sure they don’t run into each other on the baking sheet. However, if the sight of cookie-edges touching doesn’t make your skin crawl, then by all means, bake many at a time.

For the actual length of time the cookies are in the oven, I’m always extra-cautious since it’s easier to leave them in for longer. The recipe says to bake for 18-20 minutes, until golden brown.
Since I err on the side of overly nervous for fear of a burnt cookie, I started with 15 minutes and then went up from there. I think the final time was about 18 minutes; remember that cookies will continue to bake a little while they cool and firm up on the baking sheet.
They may not look perfectly done when pulled from the oven, but give them time. A few minutes later - before carefully moving them onto a cooling rack - and they will look perfect. And they will smell divine!

Shelf-life: Cookies are the absolute best fresh from the oven. I’d be crazy to say otherwise. However, the great thing about these cookies in particular is that they do get even more awesome over time.
A hot cookie is heavenly delicious, but I’m happy to report that these were still stellar for a full week after baking, which is awesome. Gluten free baked goods don’t have the best reputation for being very shelf-stable so be happy that these cookies are different.
Finally, if you find yourself stashing the cookies away for future nibbling, then find solace in knowing that they’re freezer-proof, too. We kept a dozen in the freezer for many, many weeks and they’re still (mostly) yummy. ;)
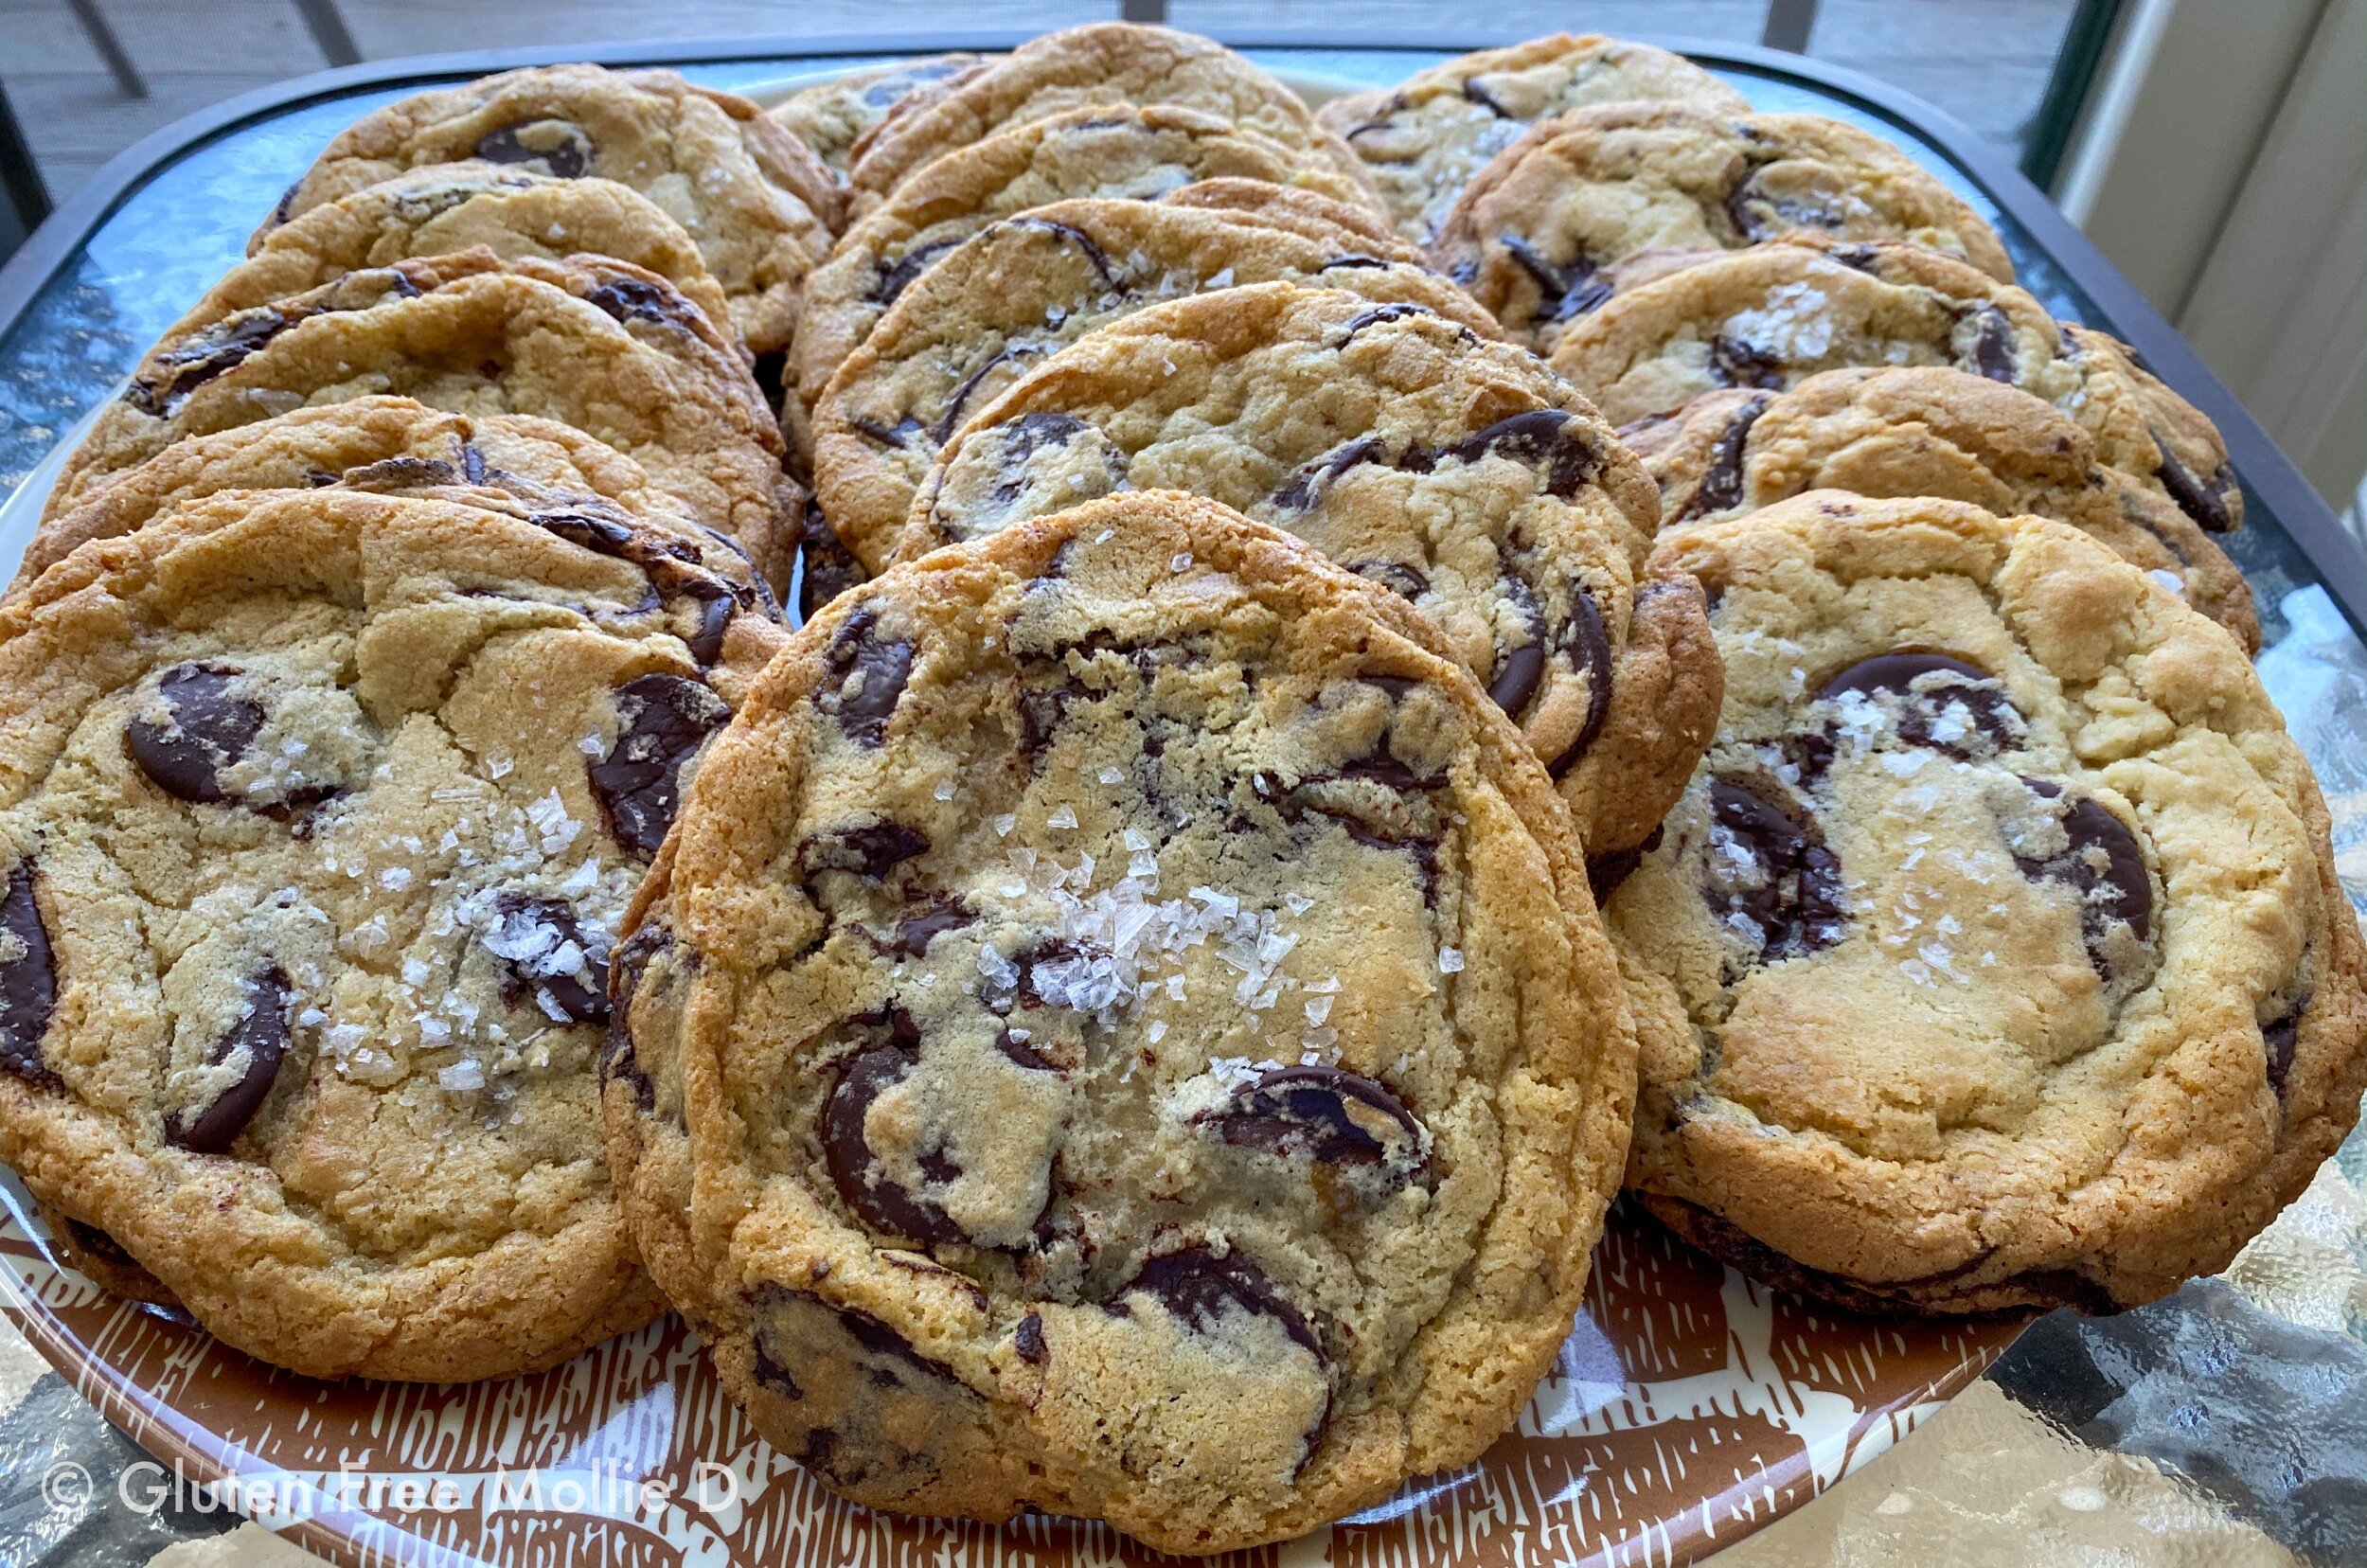
Last word: These are some of the most decadent chocolate chip cookies I’ve baked and while the waiting time can be considered ridiculous, I promise you that they’re worth it. And if you’re firmly Team Sweet, but don’t mind a pinch of savory, each cookie has a sprinkle of sea salt on top (a perfect balance). These cookies are a stupendous sweet treat.
Team Savory

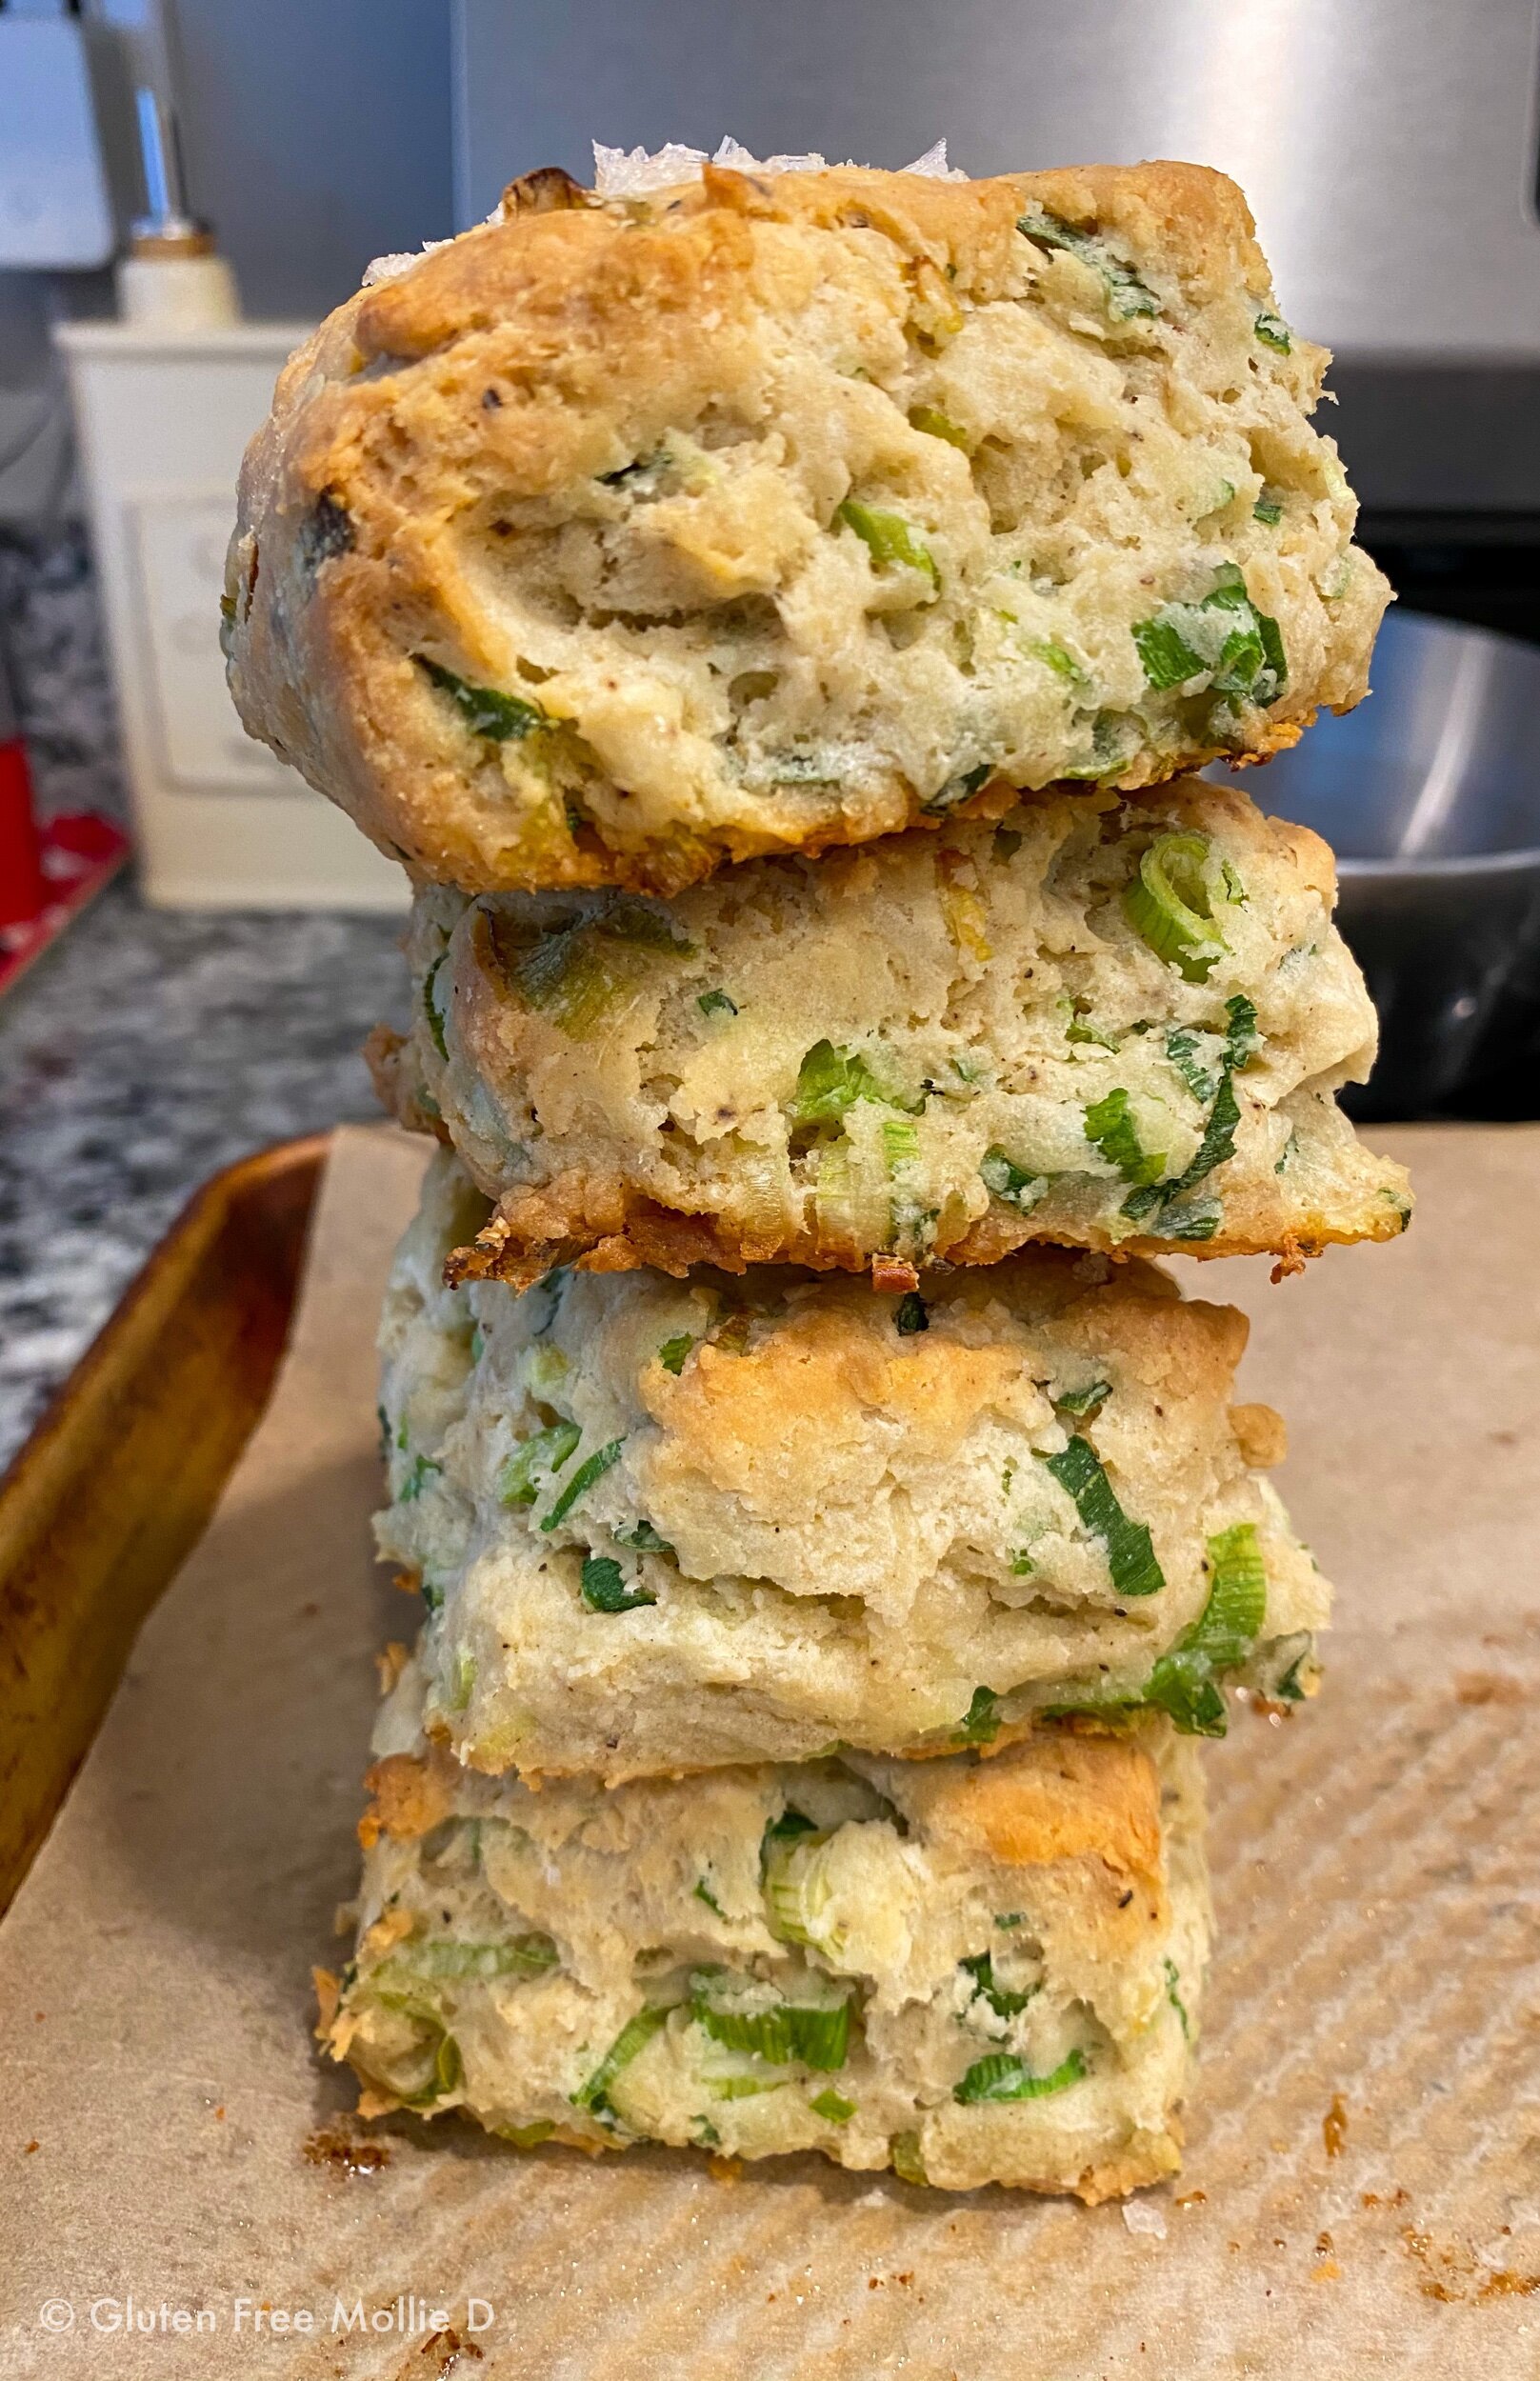
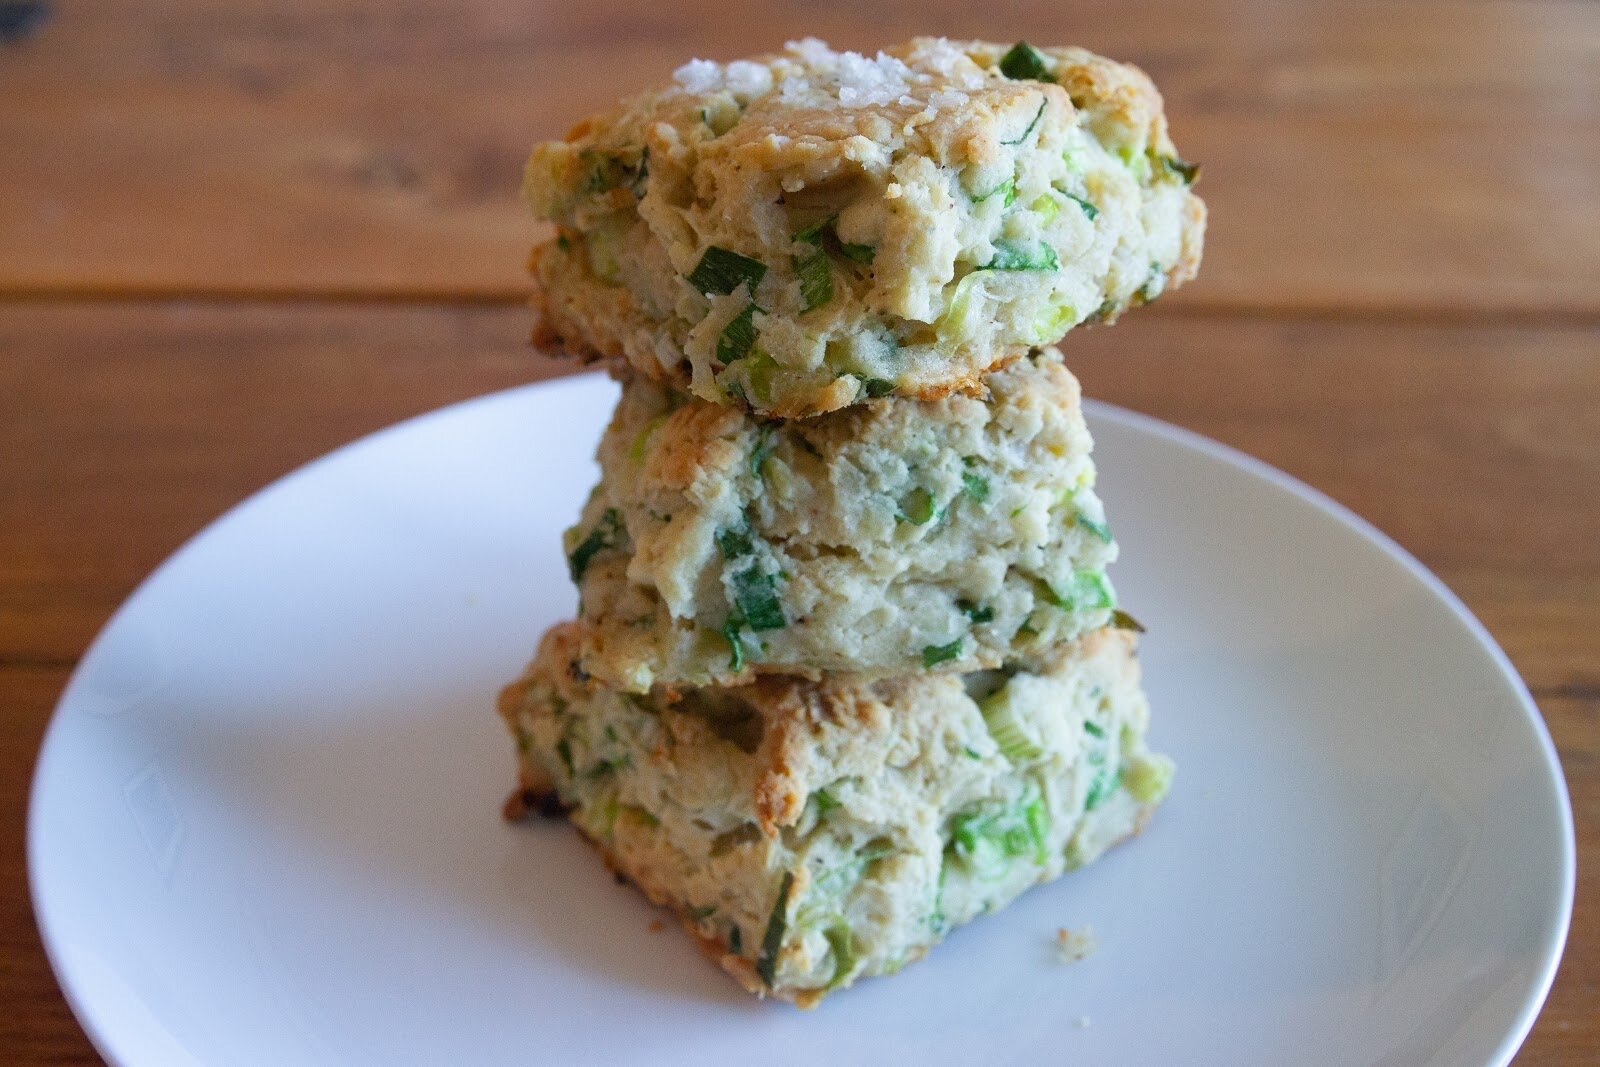
Bake this: Sour Cream and Onion Biscuits (Bon Appetit recipe by Molly Baz)
Gluten Free: Once again, the only substitution necessary for this recipe is to use gluten free flour in place of non-GF. I baked these biscuits using Cup4Cup gluten free flour. I would also recommend using King Arthur’s Measure-for-Measure gluten free flour. These are the only two brands of GF flour I use for baking.
In terms of the other ingredients, use fresh scallions, the best unsalted butter you can find, and high-quality sour cream (I like Friendship brand as well as Cabot). The great part of this recipe is that the ingredient list is short and the only swap is the flour!
Tips: Have you baked biscuits from scratch? It’s pretty fun, kind of messy, and doesn’t require anything but determination and your own strength. No fancy equipment needed - no electric mixer - and there’s slight wiggle room when it comes to preparing the dough. Not much wiggle room, but a smidge.
I followed the instructions as written, but didn’t panic (much) when my chilled butter wasn’t cut into perfect 1/2-inch pieces (some were a tiny bit bigger, some a little smaller).
The best part of the dough-prep process is mashing it (the butter into the dry ingredients) all together with your hands. It’s cathartic, satisfying, and makes you appreciate that you’re really baking from scratch, which is awesome. You will want to use that recommended fork when mixing in the sour cream. This is when it gets messy! And requires your strength from all of those arm workouts we’re all doing. ;)
Once the dough is formed, kneading it a few times on a floured surface is necessary and equally satisfying. You made dough! The folding technique described in the recipe sounds tricky, but don’t worry. It’s easier than it sounds and is a key step to making layered, flaky biscuits. Don’t get frustrated! You’re almost done.

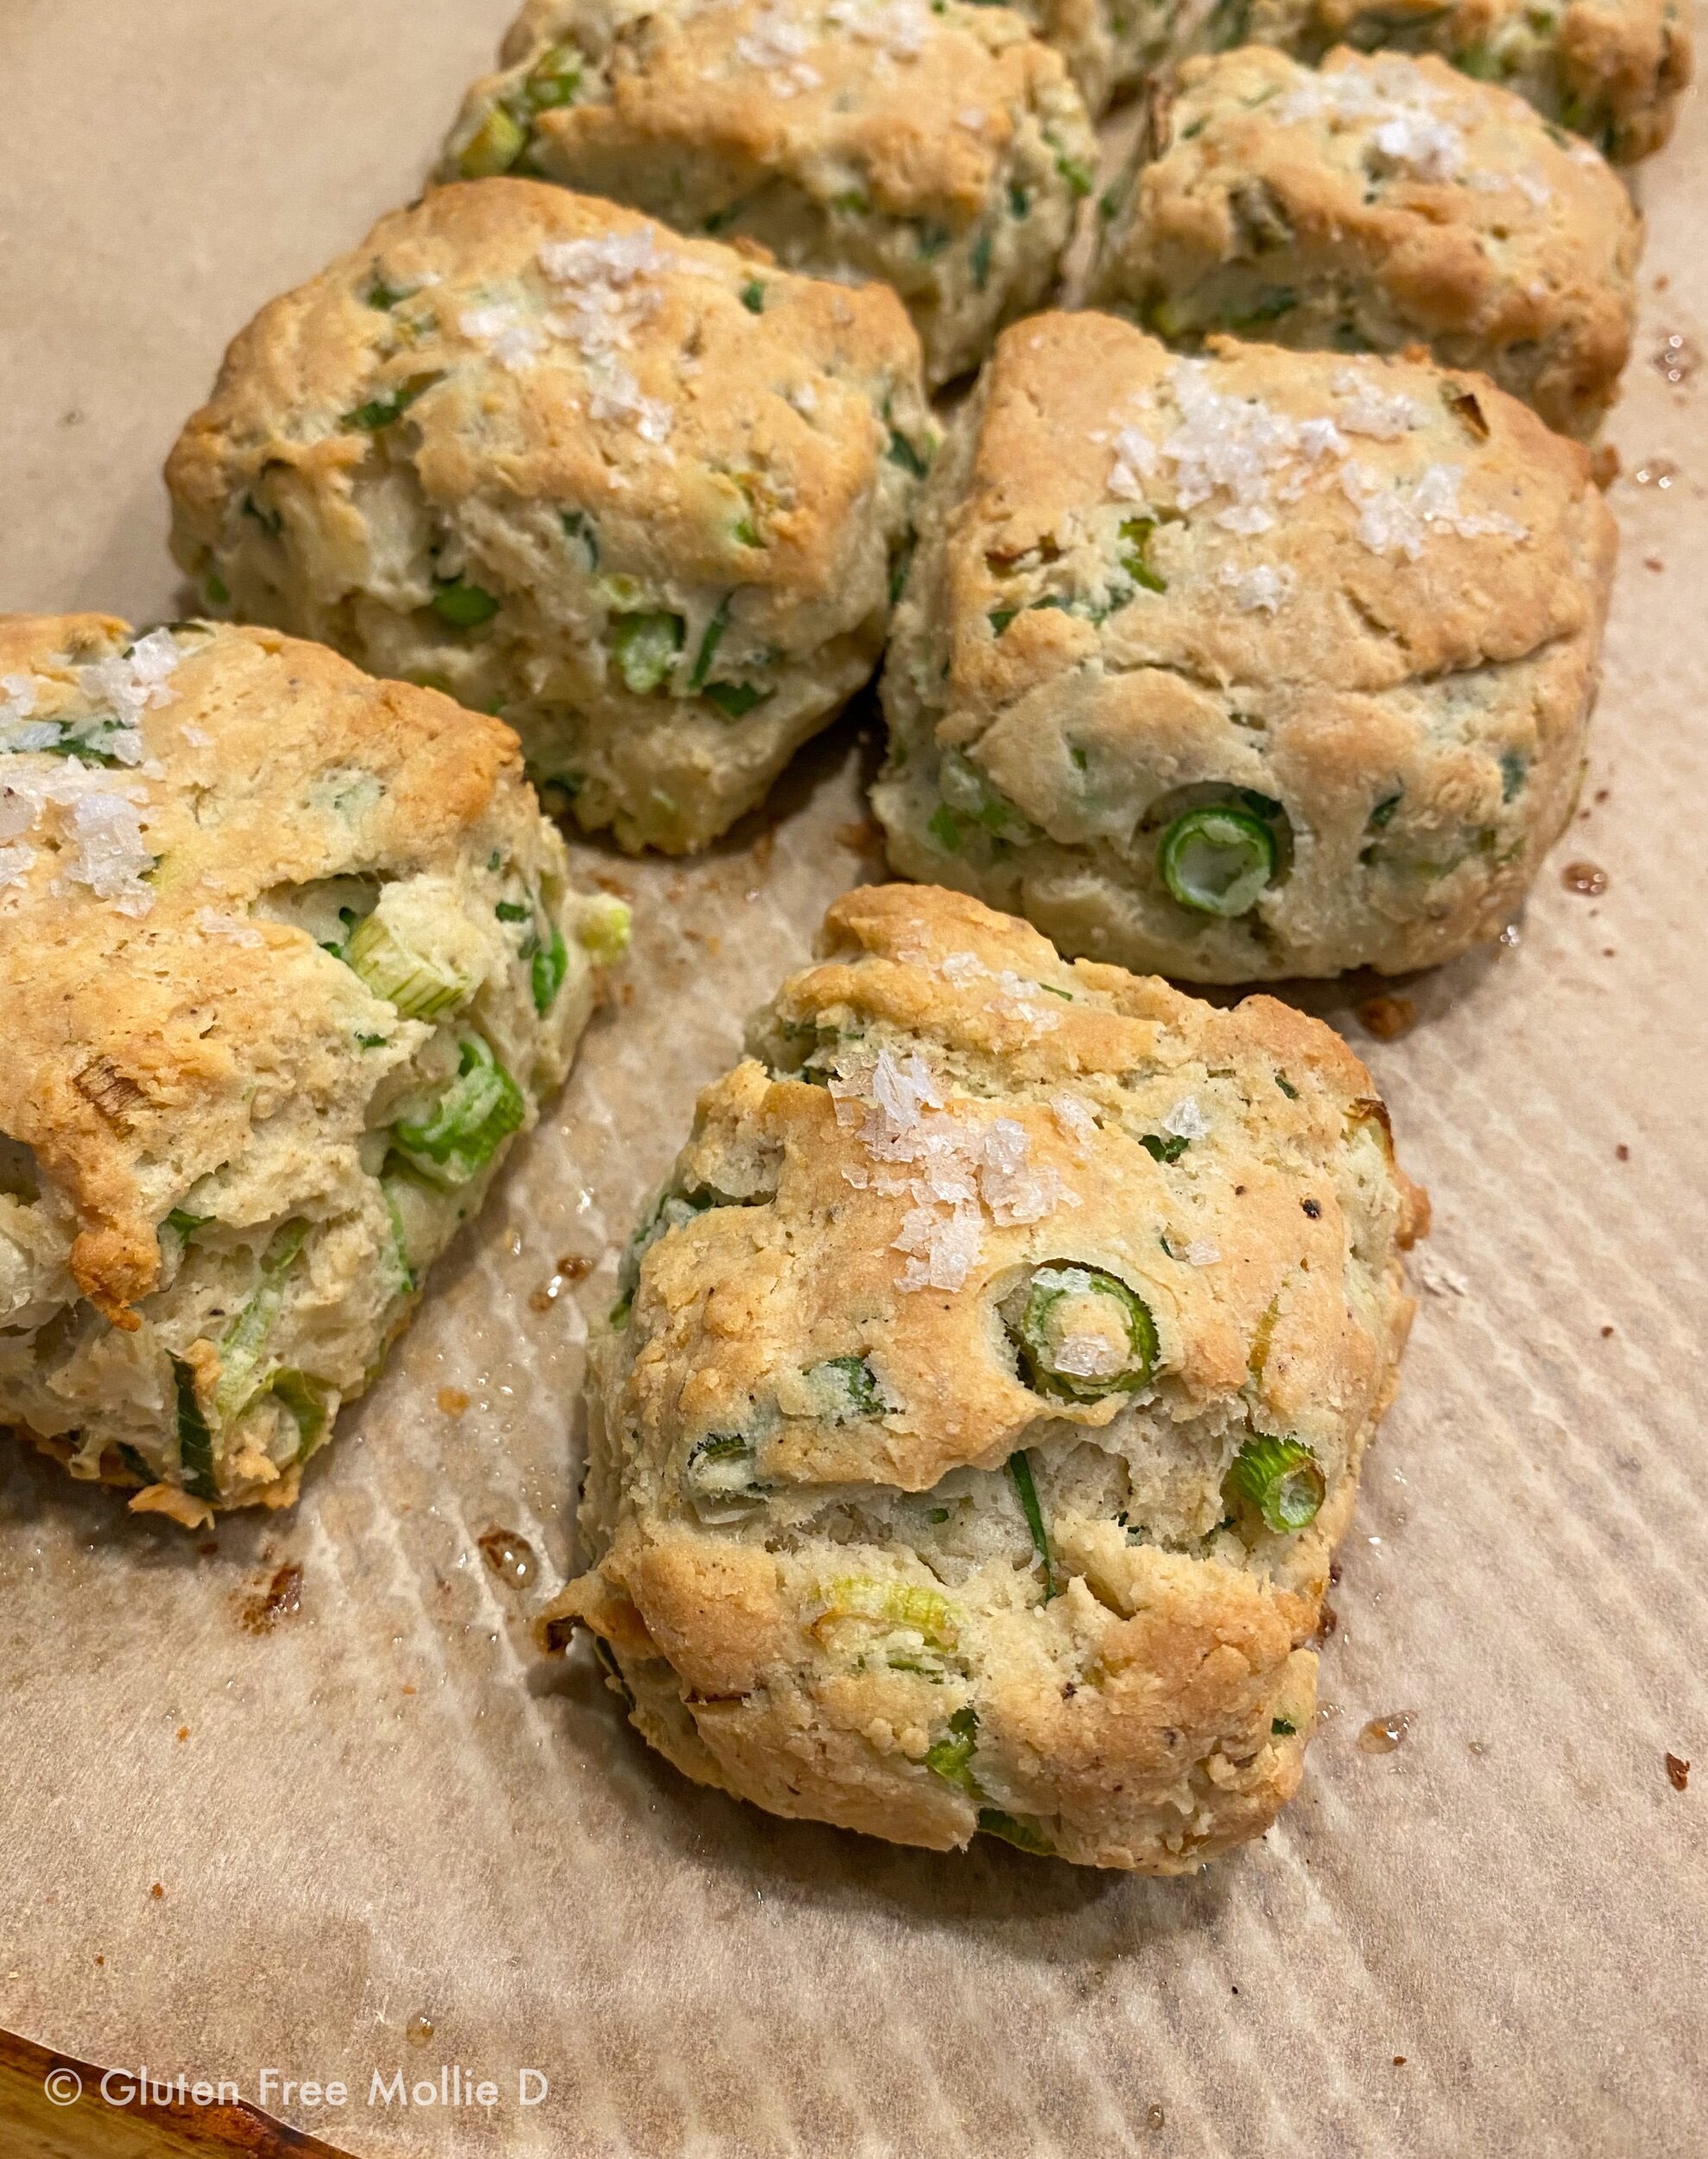
Cut the dough into eight, somewhat equal pieces (read the recipe) and you’re ready to bake. Just be sure to brush the tops with melted butter and add a sprinkle of sea salt. Much like in life, the details matter!
For baking, I’d recommend following a similar plan to the cookies above: bake for the minimum time and then keep adding minutes as necessary. The recipe states 18-22 minutes; I started with 16 minutes and increased by one minute until they looked perfectly golden.
Gluten free baked goods, especially bread-ish ones, sometimes take longer than you expect. Be patient and watch them carefully; your effort will be rewarded shortly. You’ve been warned: your kitchen will smell incredible!

Shelf-Life: Biscuits tend to be best when eaten the same day they are baked, which makes them perfect for breakfast, brunch, or lunch. They are magnificent fresh from the oven either slathered with butter or turned into a sandwich (just add eggs and cheese!) or even simply on their own.
These biscuits in particular are especially delicious without any additions thanks to the bounty of scallions and sour cream in the dough. The flavor is just fabulous. And while we did turn them into biscuit sandwiches, how could we resist, I picked at another (ok, my third), throughout the rest of the day without adding anything.

We saved enough of the batch to taste them on day two and day three since this is, of course, a very scientific report. On the second day they still had a great bite, bold flavor, and the texture had not changed too much. I’d recommend re-heating in a toaster oven, or a regular oven, to awaken the biscuit’s original goodness.

Day three, admittedly, yielded a less-than-perfect biscuit, but we still ate them (food waste is bad). Even a days-old biscuit is still a biscuit and one that is far more delicious than you expect. Therefore, I’d recommend storing them in foil, on the counter or in the fridge, and re-heating as needed.

All in all, you may just want to eat the whole batch on day one; ok fine, day one and two.
Last word: I find myself gravitating toward biscuit recipes the minute I find them since they’re one of my favorite savory foods. They’re warm, comforting, and so darn delicious I can barely stop myself from eating half of a fresh batch (don’t judge me).

Biscuits are a food meant for sharing which makes me think they’re perfect for Mother’s Day or any other time a gathering requires freshly-baked towers of carbs. So while the cookie-lovers may say it with sweets, I’d say a batch of biscuits, Team Savory, could be the best gift of all.
Now, you tell me: which recipe will you bake?
Personally, I recommend making time for both. :)
Enjoy, be safe, stay home and bake.
Mollie